$ cd ~/bin
$ tar xfz ~/Downloads/code-stable-x64-*.tar.gzDec 28, 2021
Lego 51515 on Fedora
My 13 years old son Vítek just got LEGO 51515 (a.k.a. Robot Inventor) for Christmas. He assessed the Scratch programming in the Android app as "limiting" after playing with it for a couple of hours and he uttered a wish to try Python. Unfortunately, Lego does not provide any tools for Linux, the the main OS used within our family. So we started to look for workarounds.
All steps mentioned here were done on Fedora 34.
First we tried LEGO Hub Toolkit by Steven M. Robbins which worked for us only through USB but not via Bluetooth.
Peter Staev’s LEGO SPIKE Prime / MINDSTORMS Robot Inventor VS Code Extension offered the best experience so far.
How to install LEGO SPIKE Prime / MINDSTORMS Robot Inventor VS Code Extension
Of course you need VS Code first.
Install VS Code
If you want the newest version, getting the 64 bit .tar.gz flavor from VS Code downloads page might be the safest choice.
Unpack it, once you have downloaded it to ~/Downloads:
Add the code executable to PATH environment variable so that you can open any folder using code .
Open the ~/.bashrc file with kwrite or any other text editor
$ kwrite ~/.bashrcand add the following line somewhere around the beginning of the file
export PATH="$HOME/bin/VSCode-linux-x64/bin:$PATH"Save and close the ~/.bashrc file.
Then create a new directory for your Python experiments and open VS Code in that directory:
$ mkdir -p ~/code/python
$ cd ~/code/python
$ code .
Install the LEGO SPIKE Prime / MINDSTORMS Robot Inventor Extension
In VS Code, open the Extensions view by hitting CTRL+SHIFT+x.
Then type lego spike in the search field, select the found LEGO SPIKE Prime / MINDSTORMS Robot Inventor Extension
and click the blue Install button to install it.
Connect via USB
First let’s try connecting via USB.
For this to work on my Fedora 34, I had to add the current user to dialout group.
Otherwise I was getting the Permission denied: '/dev/ttyACM0' error when connecting.
$ sudo usermod -aG dialout $USERYou’ll possibly need to restart VS Code or even re-login for the new group membership to get effective.
Then you can connect the USB cable - one end to the Lego HUB and the other end to your computer.
At the bottom of the VS Code window, click the blue LEGO Hub: Disconnected area

This should let you select the device you want to connect:
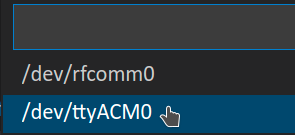
Select /dev/ttyACM0 for USB.
Once the connection succeeds, a couple of new buttons should appear at the top of the VS Code window:

These allow you to
-
Start an already uploaded program
-
Stop the currently running program
-
Upload the current file (in VS Code) to the Hub
-
Show the Hub’s terminal where you can i.a. see the error messages if something goes wrong with your little program
Hello world!
Let’s try to write some simple program to make sure that the connection really works.
Create a new file named test.py in the ~/code/python folder and paste the following into the editor:
# LEGO type:standard slot:5 autostart
import hub
hub.sound.beep(800, 2000, 0)
The first line is specific to the extension and its meaning is documented in the extension’s README.
Once you have saved the file, you can hit the ⭮ button to upload and autostart it to the hub.
You should hear a two seconds beep if everything works correctly.
Bluetooth
To test the Bluetooth connection, first disconnect the USB by clicking the blue LEGO Hub: Connected area at the bottom of the VS Code window. Then unplug the USB cable.
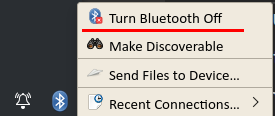
Make sure Bluetooth is on on your PC e.g. by clicking the Blueman applet icon in the system tray. If it shows an option "Turn Bluetooth Off", then your Bluetooth is apparently on :-)
Then pair the hub:
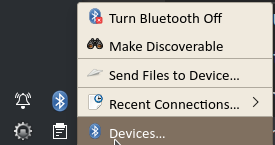
-
Click the Blueman applet icon in the system tray and click "Devices"
-
Make sure the Lego Hub is on and press the Bluetooth button on the Hub. The Bluetooth button on the Hub should start flashing blue and you should hear some beeping.
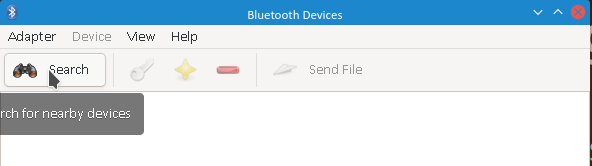
-
Then start scanning for BT devices by pressing "Search" in the Blueman Devices window
-
After a while a device named "LEGO Hub <Mac address>" should appear in the list of devices:
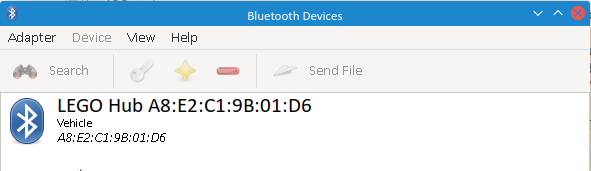
-
Open its context menu by right-clicking it and click "Pair"

Initial serial connection
Once the device is paired, create a an initial serial connection with the device using Blueman that we will disconnect right away.
I am not quite sure why this is necessary.
I guess it creates the /dev/rfcomm0 device that persists after disconnecting and which the VS Code extension is not able to do itself for some reason.
-
Right-click the Hub in Devices window and click "Connect to: Serial Port"
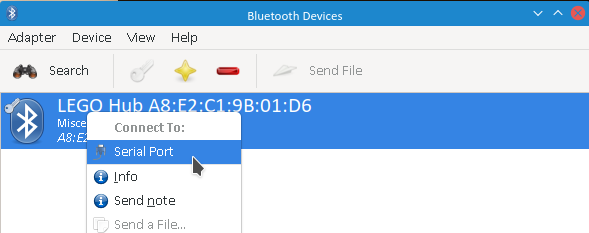
-
Once the connection succeeds the Bluetooth button on the Hub should stop flashing and should start shining blue without interruptions.
-
Make sure the the
rfcommdevice was created:$ ps -Af | grep /dev/rfcom ppalaga 4852 3657 0 14:27 ? 00:00:00 /usr/bin/python3 /usr/libexec/blueman-rfcomm-watcher /dev/rfcomm0 -
Note the index of the device - it is
rfcomm0in our case, but it could berfcomm1or something else in your case. -
Disconnect the serial port via Blueman applet menu:

These initial serial connection steps need to be performed after every restart of the computer.
Connect via Bluetooth from VS Code
-
Get back to VS Code and click the blue
LEGO Hub: Disconnectedarea
-
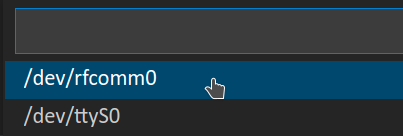
This should let you select the device to connect to.
-
If you are lucky, you see
/dev/rfcomm0with the exact index returned byps -Af | grep /dev/rfcommabove. -
If your device is not there in the list, just type it manually.
-
After that, the connection should succeed and the Bluetooth button on the Hub should start shining blue.
Upload and run a test program
To test, whether it works, you can do some change in the test.py program, e.g. prolong the duration of the beep from 2000 to 5000 milliseconds:
# LEGO type:standard slot:5 autostart
import hub
hub.sound.beep(800, 5000, 0)
After saving the file, you can hit the ⭮ button to upload and autostart it to the Hub.
You should hear a five seconds beep if everything works correctly.
That’s it for making the Hub work on Fedora. I hope I was able to save you some time.
I am looking forward to your feedback via Twitter!
Further reading
For the actual programming you may find the following resources helpful:
-
LEGO Hub Python programming API:
-
FAQ and sample projects: https://github.com/maarten-pennings/Lego-Mindstorms/tree/main/ms4